
(PROLOGUE: Attention: Visitors from Pinterest. Thanks so much for clicking through! Please do me a favor and click here —-> YouTube <—- to subscribe to my painting and drawing tutorial channel on Youtube. Its full of tips for your drawing and painting skills. Your support means the world to me. Best, James Akers)
Whether you use digital or traditional architectural rendering techniques, I hope you enjoy this post documenting the techniques I used to create a traditional architectural rendering in watercolor made for the Yale School of Music (as a gift to the donor giving the funds for the addition at the left of the original building in the photo below).
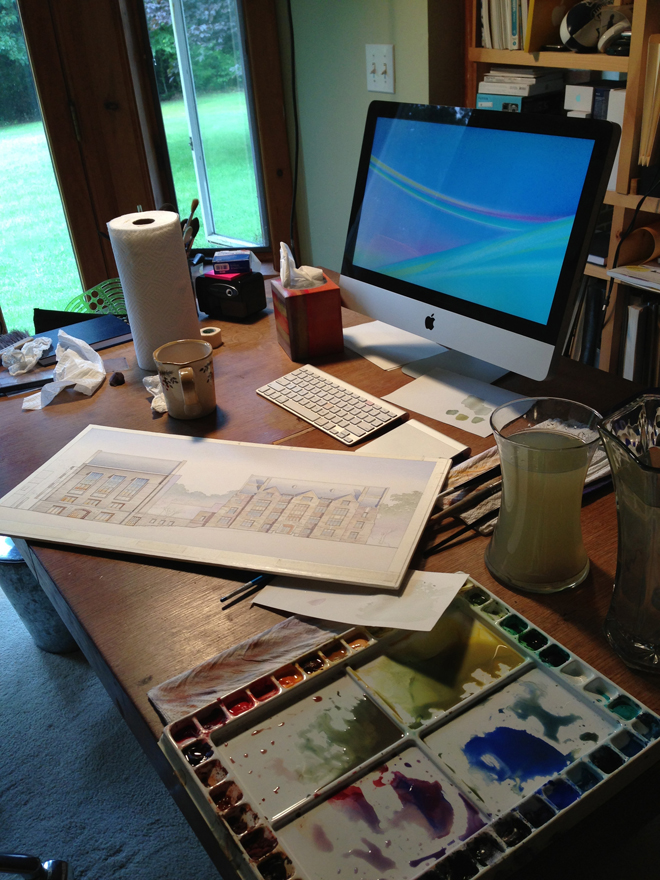
This is my current set up: computer for email, image research and Pandora; watercolor palette and old school drawing implements, bookshelves and sideyard beyond
With your permission, I'll keep words to a minimum and let the images speak for themselves.


Here is the (too dark) elevation provided by the architect.Here is the image transferred to 90 lbs cold press d'Arches paper, then mounted to 1/8" foam core"Nichiban" masking tape is applied to the perimeter of the watercolor image, leaving a nice clean edge when it's peeled off at the end. Man, I love that part.


Some of the pencil line work transferred to the paper needs touch up. To keep things simple, I use a straight edge as parallel rule.The image is now washed in beer...No! Just kidding. Don't do that. But do get your palette cleaned up and your colors juiced up and perhaps open up a beverage of choice. You're gonna be here for a while.
Where to begin? Does it matter? Beginning is the most important part, and sometimes I start in a really strange place just to get myself moving. I warned you I had unusual watercolor architectural rendering technique. In this case, I minimized thinking by starting with the stone work and roof of the original building. I have no idea why...but give me time and I'll come up with something that sounds right.

After getting a few big watercolor washes down, including a first pass at the sky, the roof, the stone walls, and the section cut through the earth, I start putting some of the more interesting shadows in--like this chimney shadow--just to see what happens.
On to the roof, building up layers. Can I go home yet?
Time to move on to the next biggest areas, like the windows. Ahh, windows. What does one do with windows? Should they reflect the sky--light toward the base and dark toward the top? Should they reflect the trees and buildings around them? Should light from the inside be stronger than light from the outside? How should I know? (Now do you see why beer is part of the process?) All I can say is, make it up as you go and hope for the best...and have every book ever written by Tom Schaller open and next to you on your desk.

Time to mess around with some windows, using light watercolor washes to get a sense of what I might do with them

More layers, more shadows, and eventually, more happiness that you just might have a strategy!!
At some point, you can't avoid it anymore and you're going to have to do the trees behind the building. Fortunately, watercolor technique for trees is pretty cool. I usually start by procrastinating: pull up a bunch of images on the screen, open another "coffee" and start mixing paint. To do trees using the watercolor technique that follows, you'll need a generous puddle of at least two colors in your palette trays, one for the top and one for the bottom. The "saturaded-ness" of those puddles is the key, so relax, be patient, test (on paper) a number of mixed combinations of water and paint until you're happy, then go for it. To be honest, mine are almost always too light at first.

Time for some trees, my friend
To do trees, you'll need a brush that, a) has a good pointy tip, and b) has an ability to hold a lot of paint in the barrel while you use the tip to squiggle in the shape of leaves as you work down the page.

Load the brush up with the top color, start making the profile against the sky, keep the paper tilted so the bead of left over paint is lined up in a full bead across the bottom of the area you are painting, and at the transition point you choose, empty the first color from your brush, fill it with the second color and continue to pull the bead downward, letting the second color dominate as you finish the profile of the lowest branches and foliage. (Optional: When you're done, if it looks too light, "drop in" smaller brush loads of a more saturated mix of the colors you just applied at the edges of the area you want darker.)

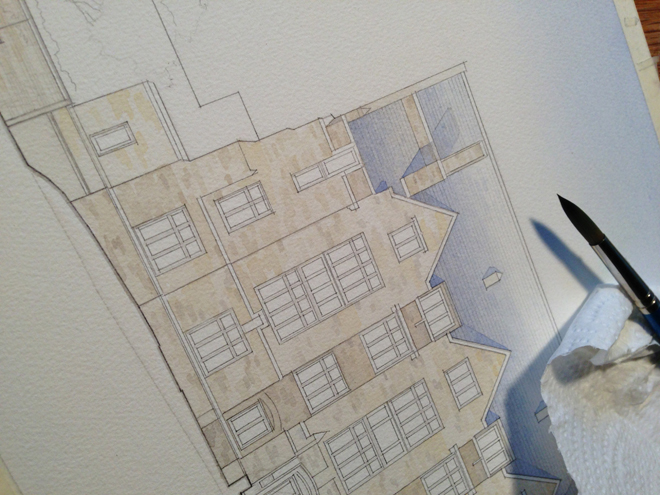
OK. I now have some stones, some roof, some sky, some shadows, some trees...I'm starting to get the sense that I might actually know what I'm doing, and that by using this watercolor technique I might actually finish this watercolor architectural rendering someday. I'm not even discouraged that's there's a whole other tree waiting to be done (see line work above)
To be honest, I have to go out and cut the lawn, but here's some screenshot details of the final rendering. Thanks for reading this far! Please ask any questions you have in the comments section below, and stay tuned for more adventures in watercolor techniques for architectural rendering.


Note that I have added trunk colors and shadows to the trees, and finished shaping them by using background color to give final shape to foreground branches and leaves, and shadow color to simulate voids in the leaf ball. Shadows on the adjacent building will soon complete the effect

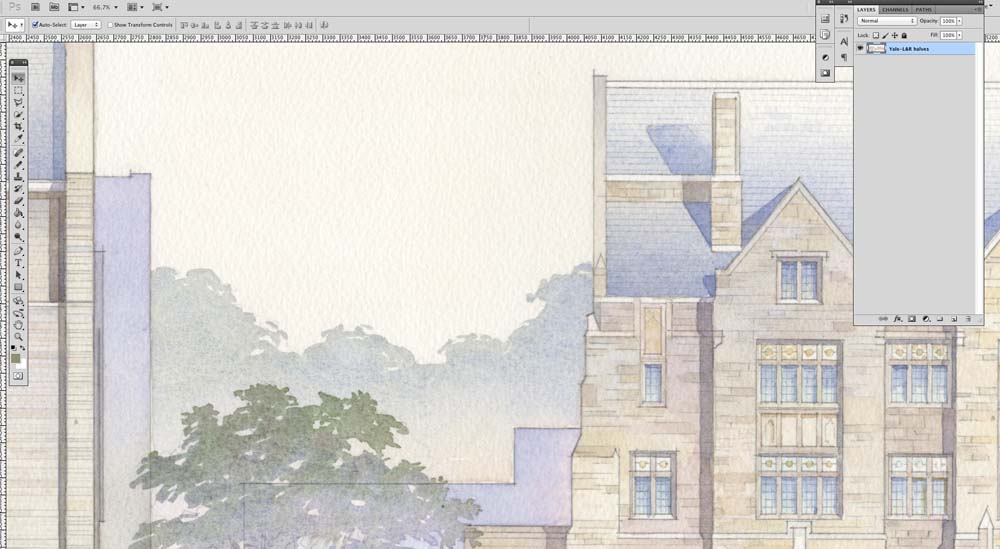
The final rendering. Hope you like it.

(Author James Akers is a registered architect and freelance digital and traditional architectural renderer who collaborates with some of the world's most admired architects and business entrepreneurs to create inspired architectural designs, house portraits and architectural renderings in all media, including watercolor, pen and ink, pencil, photoshop and computer. He may be reached directly at 413-250-8800)